Last Updated on March 26, 2021 by David
We’ve released Roles and Permissions! This has been a long-awaited feature request but we wanted to make sure it had all its wrinkles ironed out before showing it off. If you run Reamaze with multiple channels, brands, and most importantly staff members, you’ll find Roles and Permissions to be a welcome addition to managing everything like a pro.
To get started, follow our simple instructions below or watch the video tutorial:
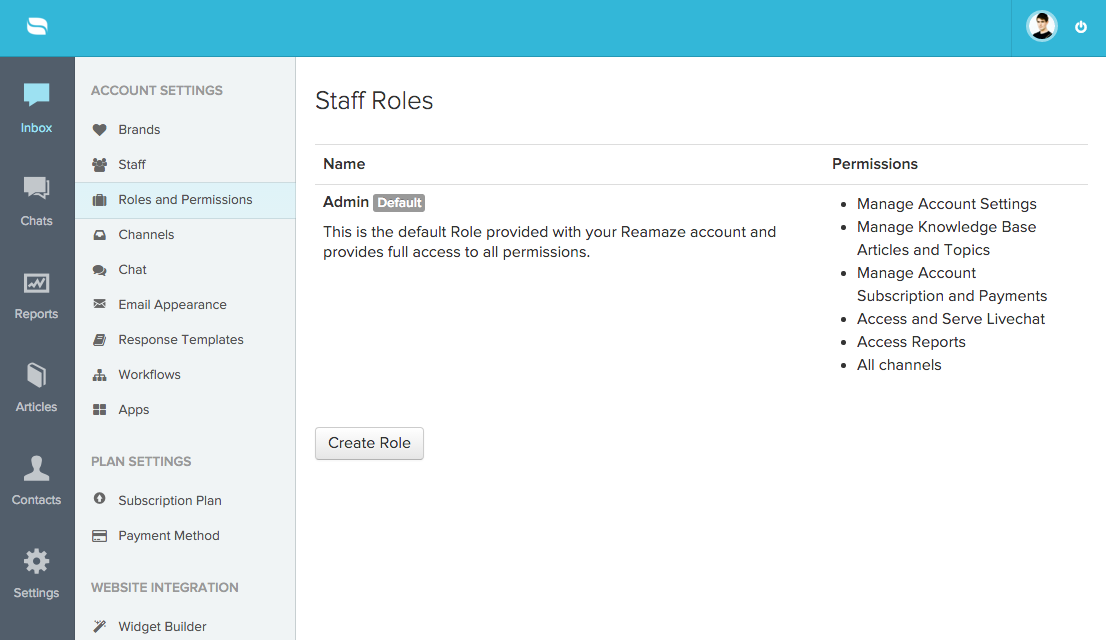
Step 1
Hop on over to your settings menu and click on “Roles and Permissions” under Account Settings.
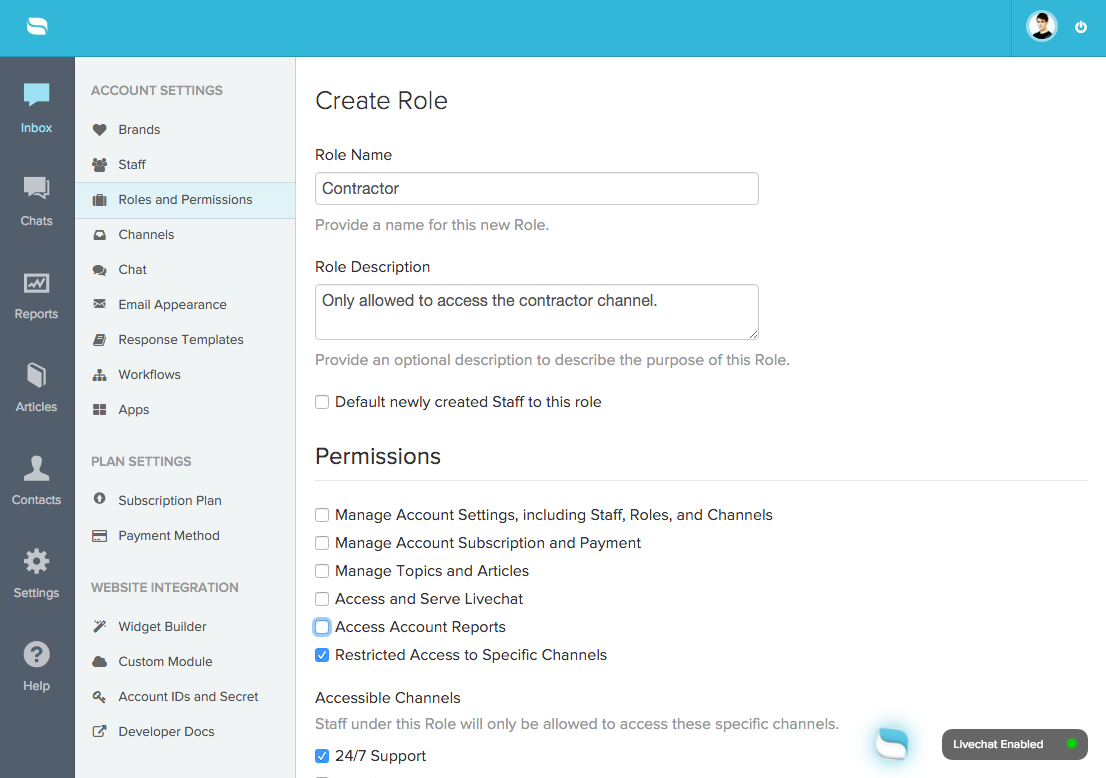
Step 2
Define the role you want to create. This includes giving it a description, setting the right permissions, and isolating that role to a specfic channel if you wanted to.
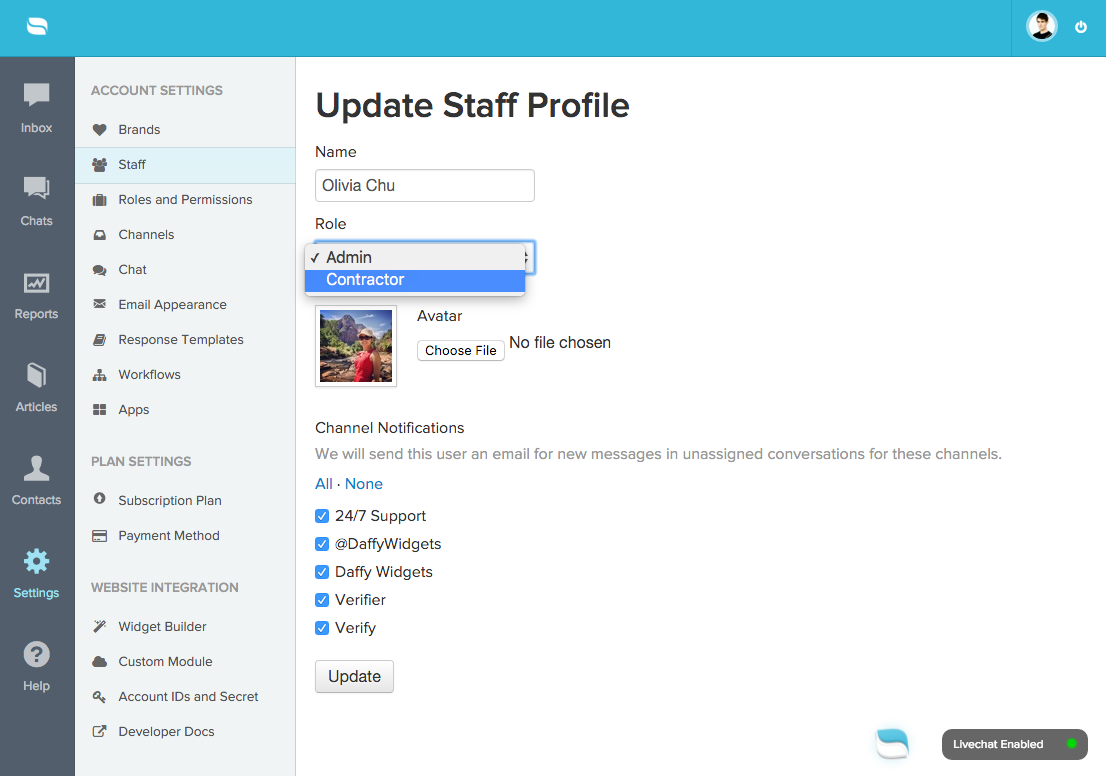
Step 3
Next, go to your “Staff” management page and assign the role to an agent. Remember, you cannot change your own role.
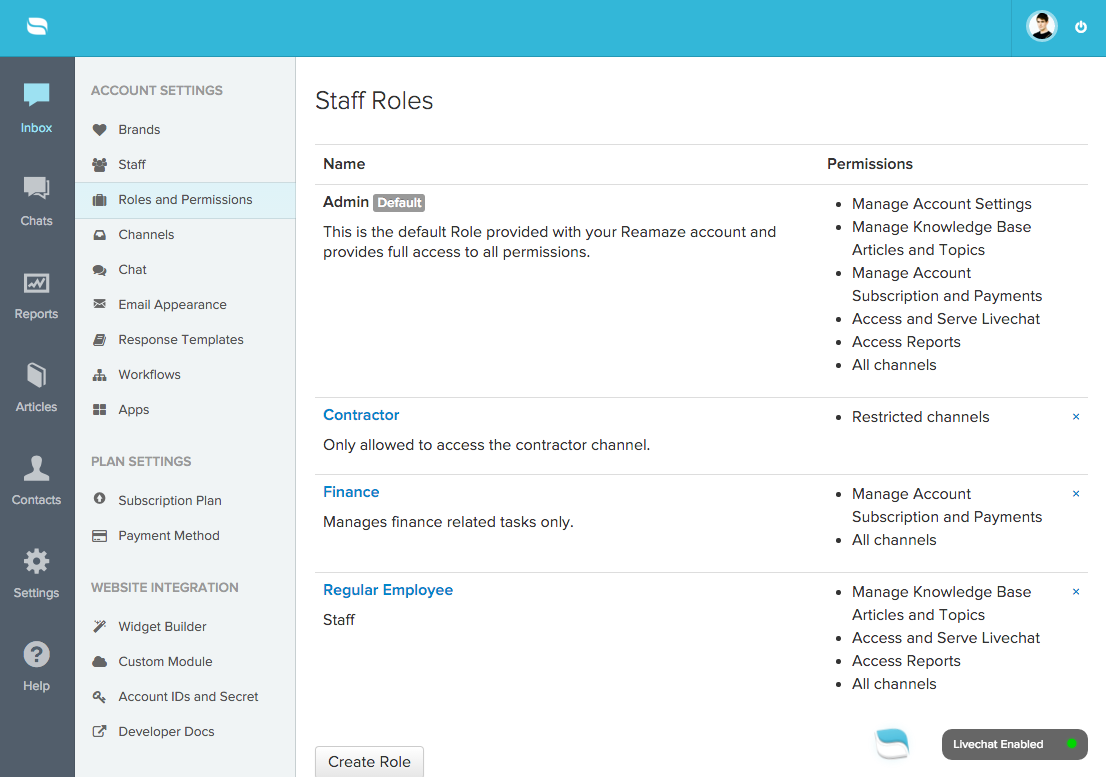
Step 4
Once set, you can go ahead and create as many roles as you’d like. Here you can see a list of roles that we’ve created for our demo account.
Enjoy!
If you have any questions. Reach out to us by clicking on the widget to your –>